A straightforward cooker hood replacement in a Helston kitchen saw the removal of an old integrated unit and installation of a new client-supplied cooker hood, fitted into the existing cabinetry with proper electrical connections to maintain safe kitchen ventilation.
Kitchen appliances need replacing from time to time, and cooker hoods are no exception. This particular job in Helston involved swapping out an existing integrated cooker hood for a new unit that the homeowner had purchased themselves. The work required careful removal of the old appliance and installation of the replacement whilst working within the confines of the existing kitchen setup.
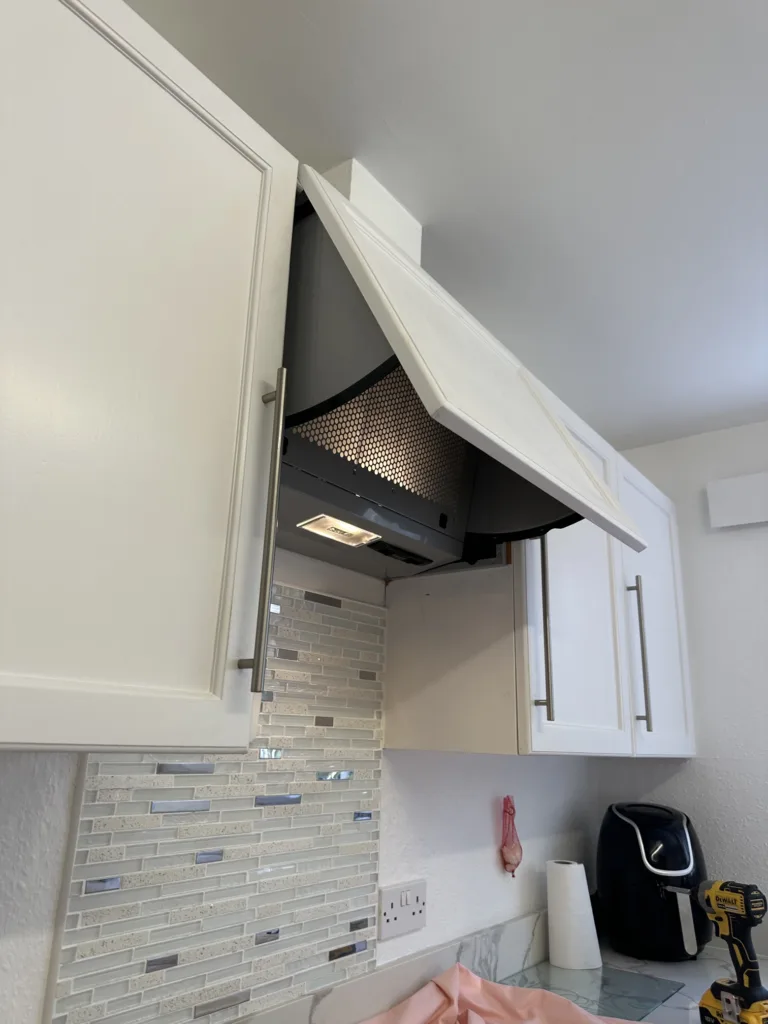
Integrated cooker hoods differ from standard models because they’re designed to sit flush within kitchen cabinetry rather than being mounted externally. This means the electrical connection needs to be made within a fairly tight space, and the unit has to align properly with the cabinet housing above the hob. Getting the fit right matters because any gaps or misalignment will be obvious once the kitchen is back in use.
The first step involved isolating the electrical supply to the existing cooker hood. Working with any kitchen appliance means taking proper precautions, and that starts with making sure there’s no power running to the unit before any physical work begins. Once isolated, the old cooker hood could be disconnected from its electrical supply and carefully removed from the cabinet housing. Integrated units are typically secured with a combination of fixings that attach to the surrounding cabinetry, so these needed to be undone methodically to avoid any damage to the kitchen units themselves.
With the old appliance out of the way, attention turned to the new cooker hood. One of the considerations with client-supplied appliances is checking compatibility with the existing setup. The new unit needed to fit the cabinet dimensions and work with the ducting arrangement that was already in place. Kitchen layouts vary considerably, and whilst most modern integrated cooker hoods follow fairly standard sizing, there can be differences in mounting points and connection locations. Fortunately, the new unit matched up well with what was already there.
Fitting the new cooker hood meant positioning it carefully within the cabinet housing. The unit needed to sit at the right height above the hob – too low and it becomes a hazard, too high and the extraction won’t work as effectively. Building regulations don’t specify an exact measurement, but manufacturers typically recommend a minimum distance based on whether you’re using gas or electric hobs. This installation involved making sure the cooker hood was positioned to provide proper clearance whilst still being accessible for the control switches.
The electrical connection followed next. Integrated cooker hoods usually require a standard 13-amp supply, though some larger extraction units might need a dedicated circuit if they draw more power. This particular installation worked with the existing electrical setup, which had been designed to accommodate an integrated appliance in that location. The wiring needed to be checked for condition and proper termination before connecting to the new unit’s terminal block. Even though the old cooker hood had been functioning fine, it’s worth inspecting the cable and connections when you’re fitting a replacement, just to make sure everything is still in good order.
Once the electrical connection was made, the cooker hood was secured into position using the mounting brackets and fixings supplied with the unit. Integrated appliances rely on these fixings to keep them stable within the cabinetry, so they need to be tightened properly without over-doing it – you don’t want to crack the cabinet panels, but the unit needs to be firm enough that it won’t shift during normal use or when the filters are being removed for cleaning.
Testing followed the installation. The cooker hood’s controls were checked to make sure the fan speeds operated correctly and that the lighting worked as it should. Most modern cooker hoods have multiple speed settings and LED lights, so each function needed verification. The extraction itself was tested by running the fan at different speeds to check for any unusual noise or vibration that might suggest something wasn’t sitting quite right. Proper operation means the fan should run smoothly across all speed settings without excessive noise, though obviously higher speeds will be louder than lower ones – that’s just physics.
The ducting arrangement also warranted attention. Whilst the new cooker hood was designed to fit with the existing setup, it’s worth checking that the ductwork connection is secure and that there are no leaks where the extraction unit joins to the ducting. Even a small gap can reduce extraction efficiency and let cooking odours escape back into the kitchen. In this case, the connection between the new cooker hood and the existing ducting lined up well, but a quick check with the fan running confirmed there were no obvious air leaks around the joint.
Kitchen ventilation serves a practical purpose beyond just removing cooking smells. Proper extraction removes moisture, grease particles and combustion products from the air. Gas hobs produce water vapour and carbon dioxide when burning, whilst all cooking generates steam and airborne grease. Without adequate extraction, this moisture can lead to condensation problems, and the grease will gradually coat kitchen surfaces. A functioning cooker hood addresses these issues by drawing the contaminated air out of the room, either through external ducting or by recirculating it through filters – this particular installation used external ducting, which tends to be more effective at removing moisture and odours.
The electrical work involved in replacing a cooker hood might seem straightforward, but there are several aspects that need attention. The circuit needs to be properly protected, the connections have to be mechanically and electrically sound, and the appliance needs to be earthed correctly. Working in kitchens also means being aware of the potential presence of moisture, even though the cooker hood itself is positioned above the cooking area. Following proper electrical practices matters, regardless of whether the job is a simple replacement or a more complex installation.
Client-supplied appliances present their own considerations. When customers purchase their own kitchen equipment, there’s an understanding that any issues with the appliance itself – whether that’s faults, compatibility problems, or warranty matters – remain with the manufacturer rather than the installer. The electrical work can be carried out to a high standard, but if the appliance develops a fault or doesn’t quite fit as expected due to manufacturing variances, those matters need to go back to the supplier. That’s why checking dimensions and compatibility before starting the installation makes sense – it helps avoid situations where you’ve removed the old unit only to find the new one won’t fit properly.
The work in Helston followed this same approach. The new cooker hood was inspected before installation to confirm it matched the existing cabinet dimensions and that all the supplied parts were present. The electrical connection was made following proper procedures, and testing confirmed everything operated as it should. The homeowner was left with a functioning cooker hood that fitted neatly into their kitchen setup, ready to handle the demands of daily cooking and keep the kitchen air clear of excess moisture and cooking by-products.
Kitchen appliance replacement forms a regular part of electrical work. Cooker hoods, ovens, hobs and other built-in equipment all have finite lifespans, and homeowners often choose to upgrade to newer models with better features or improved efficiency. Each installation needs to be approached methodically, from isolation and removal through to testing and verification, maintaining the safety standards that apply to all electrical work whilst accommodating the specific requirements of the appliance and the kitchen layout.
